Puff pastry – or pâte feuilletée (which means pastry of many layers, or “leafs” in French) can be used in sweet and savory dishes enhancing them with its flaky layers and rich buttery flavor. There are two methods for making puff pastry: the traditional recipe which starts with a small batch of dough and folds a block of butter into it, and the simpler “rough pastry” which works pieces of butter into the flour to form the dough. The rough puff pastry produces very similar flaky results to the traditional recipe, and requires less labor and time.
Contrary to popular belief, this dough is quite easy to make. I have not bought pastry dough ever since I started making my own. My recipe takes less time to make than to thaw the store-bough frozen pastry. For those who are fortunate to find fresh pastry dough, the benefit of making your own is that you can (substantially) decrease the amount of butter, while still obtaining a flaky and crisp pastry. But the main reason I make my own is that it tastes fresh and SO much better. This recipe can be stored in the refrigerator (for 2 days) or in the freezer (I would recommend to freeze no more than 2-3 months). You can use puff pastry to make tarts, strudel, cookies, and delicate pastries. You will delight yourself in the little effort it takes to make your very own!
About this recipe
I once made the traditional recipe with my mother and was in shock at the amount of butter used. What gives the pastry its many layers is the process of how the dough is folded, not necessarily how much butter is used. Of course the butter gives the pastry its richness and flaky layers, but you can still achieve the “puff” effect using less of it. The traditional recipe my mother makes has a ratio of 1:1 flour to butter (gasp! I didn’t eat puff pastry for a while after I discovered that). I have tried many versions of her recipe decreasing the butter as much as possible and acquiring the simpler “rough pastry” method. You can always increase the amount of butter if you wish; but I don’t think you will find the need. The flavor of this recipe is very similar to the original and you still get the dough to puff; while saving on lots of buttery calories in the process. I provide a step-by-step photo illustrated guide on how to roll the pastry so you can see how easy it is to make it. I have also cut the resting time achieving the same desired effect.
Easy Homemade Puff Pastry
Yields enough for two dough pieces of approximately 12x10in (30cm x 25cm) in size
Prep time: 20 min + resting time (at least 30min)
Ingredients:
- 1 3/4 cups (250g) flour
- 11 TBL (155g) unsalted butter (you can even use as little as 8 TBL (115g) for even lighter pastry but it will be a little flatter, which is ok for tarts)
- Pinch of salt
- 10-12 TBL ice-cold water (start with 10 TBL, depending on the flour, you may need to add another tablespoon or two)
- *plus 1 egg for the egg wash before baking (see note below)
Directions
- Sift flour and salt in a bowl. Add the ice water to the flour mixture.
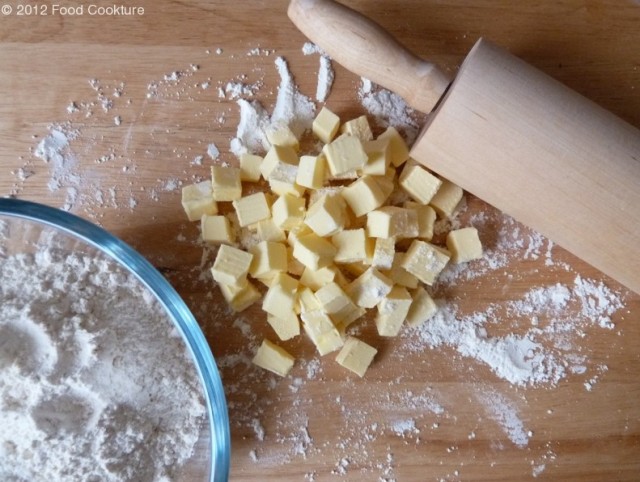
- Cut butter into small cubes and add to the flour mixture using a pastry blender (or a food processor) cut through the butter into the flour. You should still have little pieces of butter
- Note: If you do not have a pastry blender or a food processor, you can use a fork to cut through the butter in the flour. Avoid using your hands so the butter remains cold.
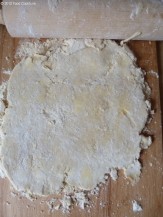
- Once you obtain somewhat of a dough mixture (the dough will get smoother once you roll it), transfer to a lightly floured surface.
- Using a rolling pin, start rolling the dough while bringing lose pieces of flour and butter into the mixture.
- Note: Flour the rolling pin often so the butter does not stick to it while you roll the dough.
- Important Note: The butter will get softer and blend into the dough the more your roll (during the steps below). If working in a warm kitchen or you notice the butter melting while you roll the dough, put the dough in the refrigerator for 5-10 minutes before continuing to work with it. A good tip if your kitchen is warm and you do not want to keep putting the dough in the fridge is to roll the dough on a cold surface (you can put a tray or marble/wood board in the freezer or refrigerator, then place a piece of plastic wrap or parchment paper over the chilled tray and roll the dough over it).
Making the Puff Pastry
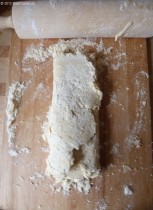
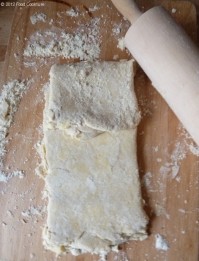
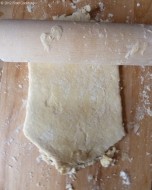
STEP 1: Once you obtain a somewhat smooth surface, roll the pastry to a rectangular shape. You will fold the pastry into thirds (similar to folding a letter to be placed in an envelope). First fold the top third over the middle of the pastry. Then fold the bottom third over that piece. Now rotate the folded pastry a ¼ turn to the right (so the folds are now vertical/perpendicular to you and not horizontal/parallel).
STEP 2: Roll the folded dough until obtaining a rectangular shape as above. Repeat folding steps: fold top third over the dough, then fold bottom third over that piece. Rotate the folded pastry a ¼ turn (always rotate in the same direction). The dough becomes smoother with each rolling and folding step.
STEP 3: Repeat the folding and rolling step above 2 more times (for a total of 4 times). Wrap dough with plastic wrap and let it rest in the fridge for at least 30 minutes (up to 2 days, whenever you need to use it. You can freeze the dough at this point and thaw it at room temperature before proceeding with steps below).
Remove from fridge (or thaw it from freezer) and repeat the folding and rolling step above 2 more times.
Roll dough to a thin pastry (1/4 inch/3 mm) – not too thin or you can compromise how much it will rise. The dough is now ready to be used!
Using the Puff Pastry
- You can shape the dough into any shape, or roll it out into a rectangle and cut it into small squares.
- *For the puff pastry to obtain its golden color and shiny surface, you need to brush it with an egg wash before baking.
- Note: An “egg wash” is simply a beaten egg to be brushed over the dough to give its golden color. My mother makes her egg wash with the egg yolk and a little bit of milk or a little bit of water. Sometimes I use the entire egg and not add any milk or water.
- For simplicity, if you are making a tart, you can brush the egg wash over the entire surface and then add the topping of your choice; or just brush the egg wash over the borders. If using the puff pastry to be folded (such as in making strudel or croissant), just brush the egg wash over the top surface before baking.
- If using puff pastry for a tart recipe, make sure you pierce the pastry with a fork or knife so it does not puff unevenly while baking. I usually make little “X” shapes for my tartlets so the dough doesn’t puff at all in the middle, just around the borders.
- When ready to bake, pre-heat oven to 400°F (200°C) and only put the pastry in once the oven has reached that temperature. Do not open the oven door until the pastry is golden brown and ready to be removed from the oven; otherwise the pastry may not reach it’s full “puff” potential. Depending what you are using the pastry for, usually 10 minutes is enough time to get a nice golden color – pay attention to the oven as you do not want to burn your pastry!
I hope you enjoy this recipe and see many uses for it. Now that you see how simple it is to make puff pastry at home (and once you taste how delicious it is), I hope you make it often! Enjoy!












Great read thaanks
I do agree with all of the ideas you have introduced in your post.
They’re really convincing and can certainly work. Still, the posts are very short for beginners.
Could you please prolong them a bit from subsequent time?
Thanks for the post.
I would like to see a picture of the baked product.
Hi Paula, the first 2 photos above are baked products using this recipe for puff pastry: the 1st photo I baked the puff pastry on it’s own and the 2nd photo is a strudel I made using the puff pastry. Hope that helps – I’ll be posting more recipes using this puff pastry in the near future :-)
My hat is off to your astute command over this toovb-craip!
Thank you soooooooooooo very much for this great simple n quick recipe and especially 4 d effort to include clear pictures which makes it all d more easier. Will definitely try it Soon. THANK u again
Glad you like the recipe and that the pictures help… Adding the pictures is worth the effort to make sure people saw how easy it is to make puff pastry at home! Hope you try it soon… I bet you’ll never buy it from a supermarket again :-)
Pingback: Mom? What is there to eat? « Musings of a Mad Mother
I stumbled on your blog while doing a google search on puff pastries. I had despaired of being able to make one until I read this recipe! This was so easy and simple that I made it with my 5 year old,4 year old and 18 month old as helpers! So delicious too! It was a big hit! Thank you for posting this!
I’m so happy you liked this recipe! Glad you found it simple and delicious; I try with each recipe I post to simplify things for people to try. How fun that you shared this cooking experience with your children! I applaud you! More moms should do that :-) Thank you for visiting the blog and leaving a comment :-) Hope you come back soon… and any questions feel free to post them here or send me an email! Have fun cooking with the little ones!
Alessandra
Excellent illustrations, this makes the recipe easy to follow!
Thank you Lynn! I wanted to show people how easy it is to make it from scratch. Puff pastry has a reputation of being complicated and at patisserie-level. Photos help anyone make it at home :)
Absolutely fabulous! I love that you use less butter and made it so simple. :)
Thank you Jacquie! I knew you would like this recipe! Every time I make it I’m amazed at how fast it can be done at home… and tastes so good!!! And it’s so cool to see the many layers once you cut the rolled dough (as shown in pic #3). Let me know when you make it :)